|
Programming Taskbook |
|
|
||
|
Electronic problem book on programming |
||||
|
© M. E. Abramyan (Southern Federal University, Shenzhen MSU-BIT University), 1998–2026 |
|
|
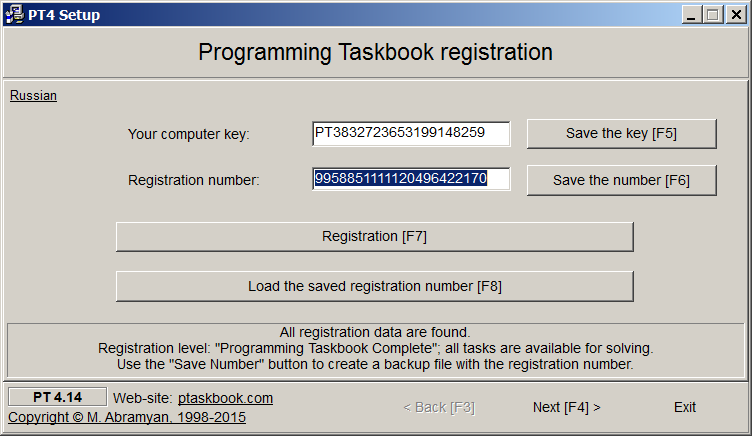
Taskbook setup (PT4Setup)After the Programming Taskbook installation, the PT4Setup program is launched automatically. This program allows to register Programming Taskbook and configures Programming Taskbook for available environments. Also it allows to choose the working directory of Programming Taskbook. This program is also available from the Programming Taskbook menu (see "Start | Programs | Programming Taskbook 4"). The PT4Setup window consists of three sections, which can be selected by the Back (F3) and Next (F4) buttons and corresponding hot keys. To exit the program, you should click the Exit (or Finish) button or press the [Esc] key.
The first section is intended for Programming Taskbook registration.
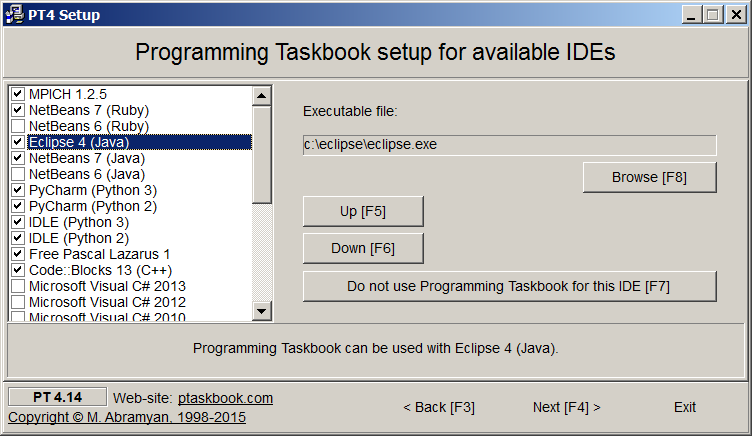
The second section is intended for the IDEs setup. If some IDE in the left-hand list is checked, then it means that the Programming Taskbook found the executable file of this IDE and the IDE is available for using with the Programming Taskbook. In the case of unchecked IDE, you can try to find the executable file of this IDE manually by means of the Browse (F8) button. For complete removing of some IDE from the IDE list, you should click the button Do not use Programming Taskbook for this IDE (F7). You also can change the order of items in the IDE list by means the Up (F5) and Down (F6) buttons. This order is alse used in the popup menu of the PT4Demo and PT4Load modules.
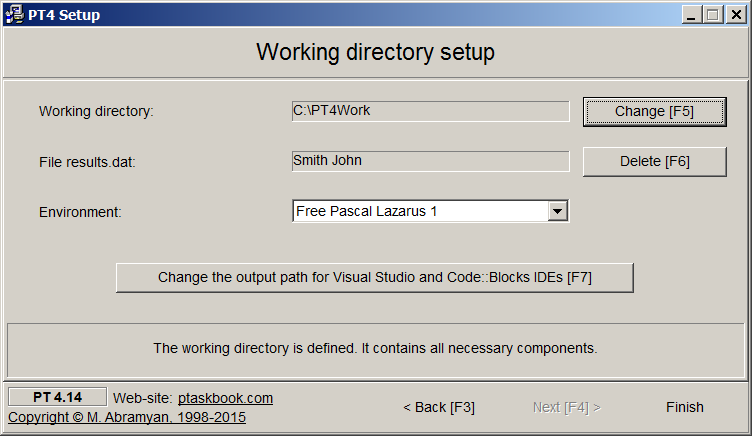
The third section is intended for setting of work directory properties: its name
(the default value is
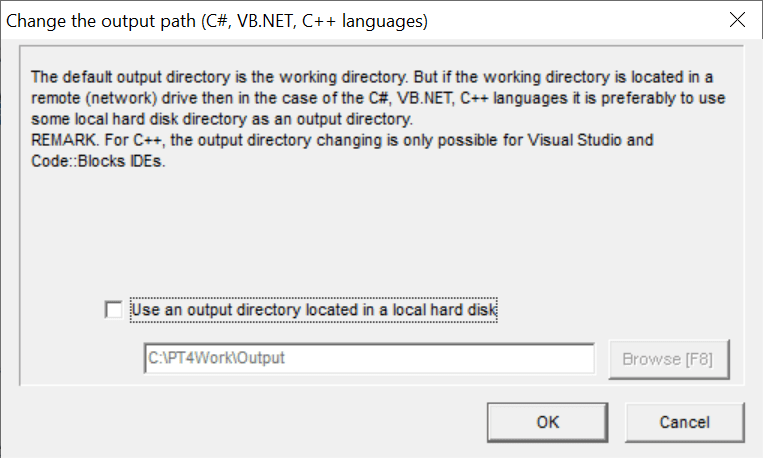
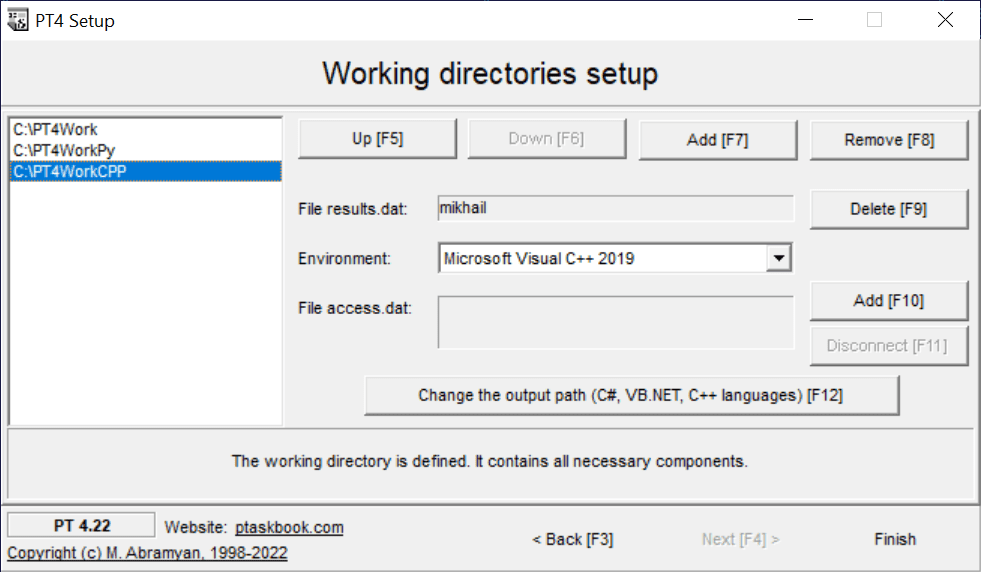
The button Change the output path (C#, VB.NET, C++ languages) changes the path for compiled executable files. This opportunity is useful when the working directory is located at the network drive. In version 4.22, the third section of PT4Setup has been modified so that you can setup several working directories simultaneously, as well as add access.dat certificate files to the required working directories (access.dat files provide automatic connection of the Programming Taskbook to a remote repository for downloading additional data from it and sending solution results; these files are created using the tools included in the Teacher Pack extension of Programming Taskbook).
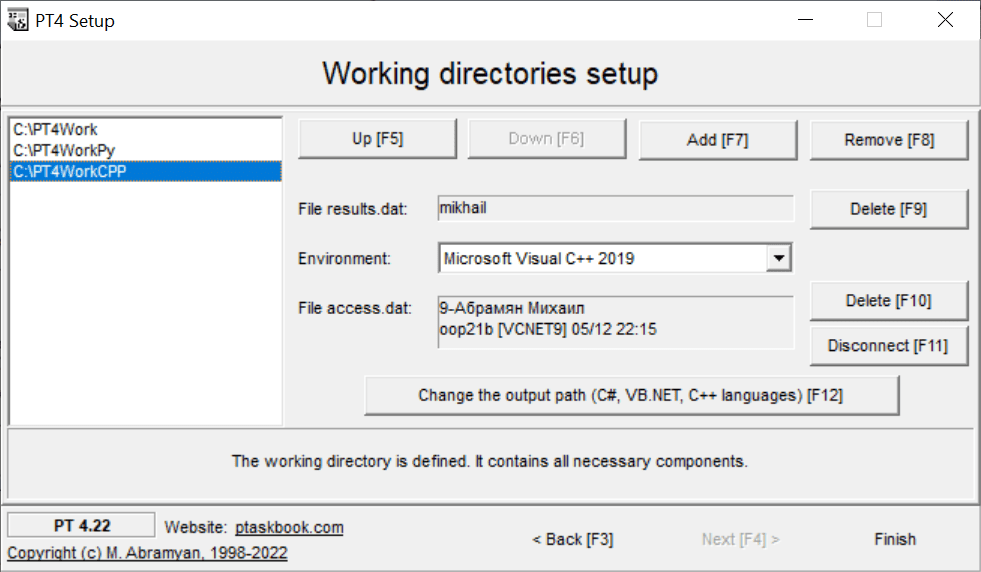
The first row of buttons is for configuring the list of working directories; they allow you to change the order of the directories in the list, add a new directory to the end of the list, and remove a selected directory from the list (removing a directory from the list does not remove it from the disk; if the list contains a single working directory, then that directory cannot be removed). The list of directories defined in this way is used in the PT4Panel program module, which also appeared in version 4.22 and allows you to quickly launch all Programming Takbook modules in any of the configured working directories. As in the previous version of this PT4Setup section, you can specify student data (which will be saved in the results.dat file) and set the current programming environment for each working directory. In addition, using the Add (F10) button, you can add an access.dat file to the working directory (this will change the name of the button to Delete (F10), and clicking on it will remove the access.dat file from the directory). When you add an access.dat file to the directory, the information associated with it is displayed in the text box.
It is also possible to temporarily disconnect the access.dat file from the working directory using the Disconnect (F11) button. Clicking it will change the access.dat file name to access0.dat (the name of the button will change to Connect (F11), and the subsequent clicking it will restore the access.dat file for this directory). From any section of the PT4Setup, you can go to the website of Programming Taskbook by clicking on the ptaskbook.com label in the bottom left of the program window. |
|
|
Designed by |
Last revised: |


